> For the complete documentation index, see [llms.txt](https://docs.payrexx.com/platform/llms.txt). Markdown versions of documentation pages are available by appending `.md` to page URLs; this page is available as [Markdown](https://docs.payrexx.com/platform/english/admin/settings/backend-template.md).

# Backend Template

This article explains how to configure default settings for connected merchant accounts regarding layout and presentation.

The settings are divided into the following sections:

* [Logo, Colors, and Favicon Settings](#logo-colors-and-favicon-settings)
* [E-Commerce Tools Settings](#e-commerce-tools-settings)
* [Login and Signup Page Settings](#login-and-signup-page-settings)

To access these settings, navigate to **Settings > Backend Template** in your Payrexx platform administration.

## Logo, Colors, and Favicon Settings

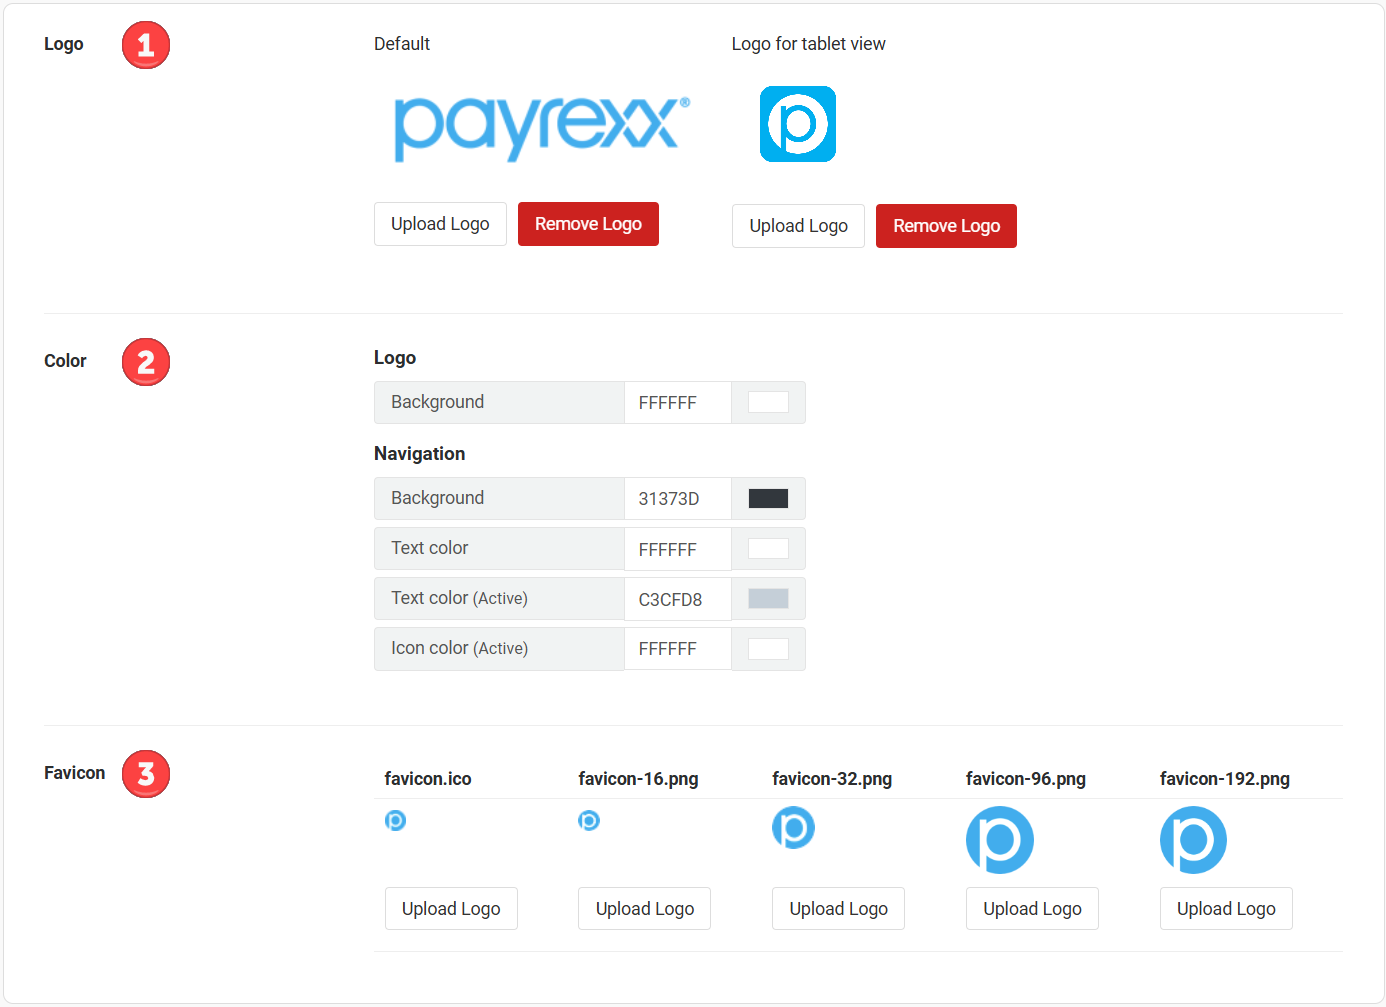
At the top of the window, you can upload logos, define colors, and set favicons:

<div align="left"><figure><img src="https://13947520-files.gitbook.io/~/files/v0/b/gitbook-x-prod.appspot.com/o/spaces%2F-McKWr2N1ZENCggMlAH5%2Fuploads%2F5RgjrlXiF3W7rAAm7d12%2Fimage.png?alt=media&amp;token=b76aa7f5-bd5d-426a-81fb-aee05e00ceac" alt=""><figcaption><p>Settings for logo, colors, and favicon in the Payrexx platform administration</p></figcaption></figure></div>

#### 1. Logo

You can upload two different logos: a standard logo and one specifically for tablet view.

#### 2. Color

In addition to the logo's background color, you can configure various navigation color settings:

* **Background:** The background color of the navigation
* **Text color:** The color of the menu items
* **Text color (active):** The color of the active, selected menu item
* **Icon color (active):** The color of the icons

#### 3. Favicon

Upload different sizes of your favicon. The smallest version should be 16 × 16 pixels, and the largest up to 310 × 310 pixels.

{% hint style="info" %}
The favicon, short for "favorite icon," is the small symbol displayed to website visitors in browser tabs, bookmarks, and address bars, serving to reinforce the website’s branding and identity.
{% endhint %}

## E-Commerce Tools Settings

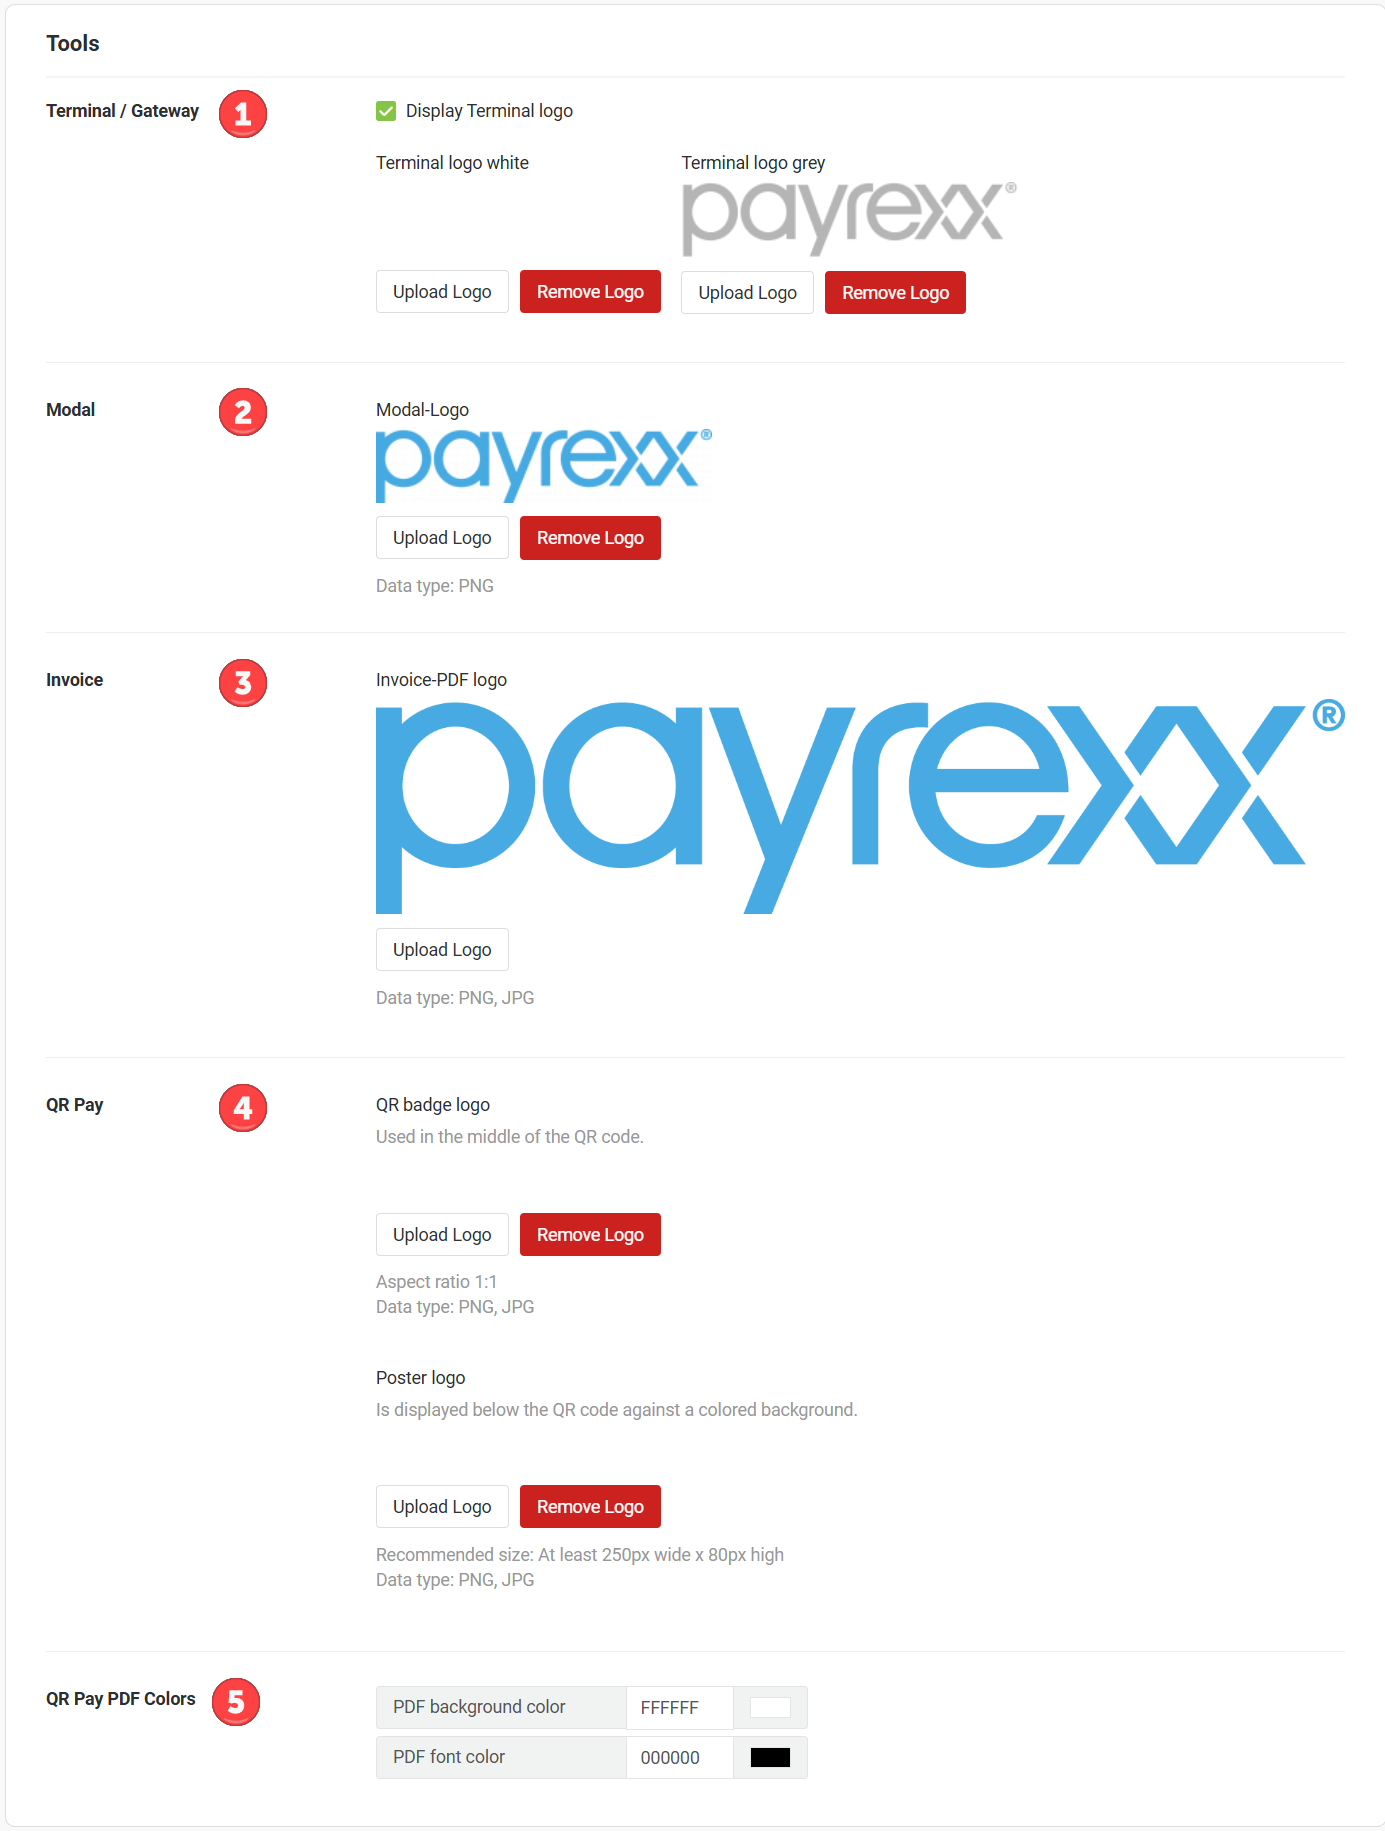
In the middle section of the window, you can upload logos for the various e-commerce tools and make additional color adjustments:

<div align="left"><figure><img src="https://13947520-files.gitbook.io/~/files/v0/b/gitbook-x-prod.appspot.com/o/spaces%2F-McKWr2N1ZENCggMlAH5%2Fuploads%2F882uD4YzeaEk6elCmDW2%2Fimage.png?alt=media&amp;token=daac488e-8220-4fc0-aecb-1ef61b4d38e1" alt=""><figcaption><p>Settings for logos and colors of e-commerce tools in the Payrexx platform administration</p></figcaption></figure></div>

#### 1. Terminal / Gateway

Decide whether the logo should be displayed in the [Terminal](https://docs.payrexx.com/merchant/english/account/tools/terminal) e-commerce tool or not. Then upload two versions of the logo: one in white and one in grey.

#### 2. Modal

Upload a modal logo.

#### 3. Invoice

Upload the logo that should appear on invoices sent to customers as PDFs.

#### 4. QR Pay

For QR Pay, you can upload two logos:

* **QR Badge Logo:** This logo is displayed in the center of the QR code, reinforcing the branding of your QR codes.
* **Poster Logo:** This logo appears in the footer of QR code posters.

#### 5. QR Pay PDF Colors

Define the background and text colors for QR Pay PDFs.

## Login and Signup Page Settings

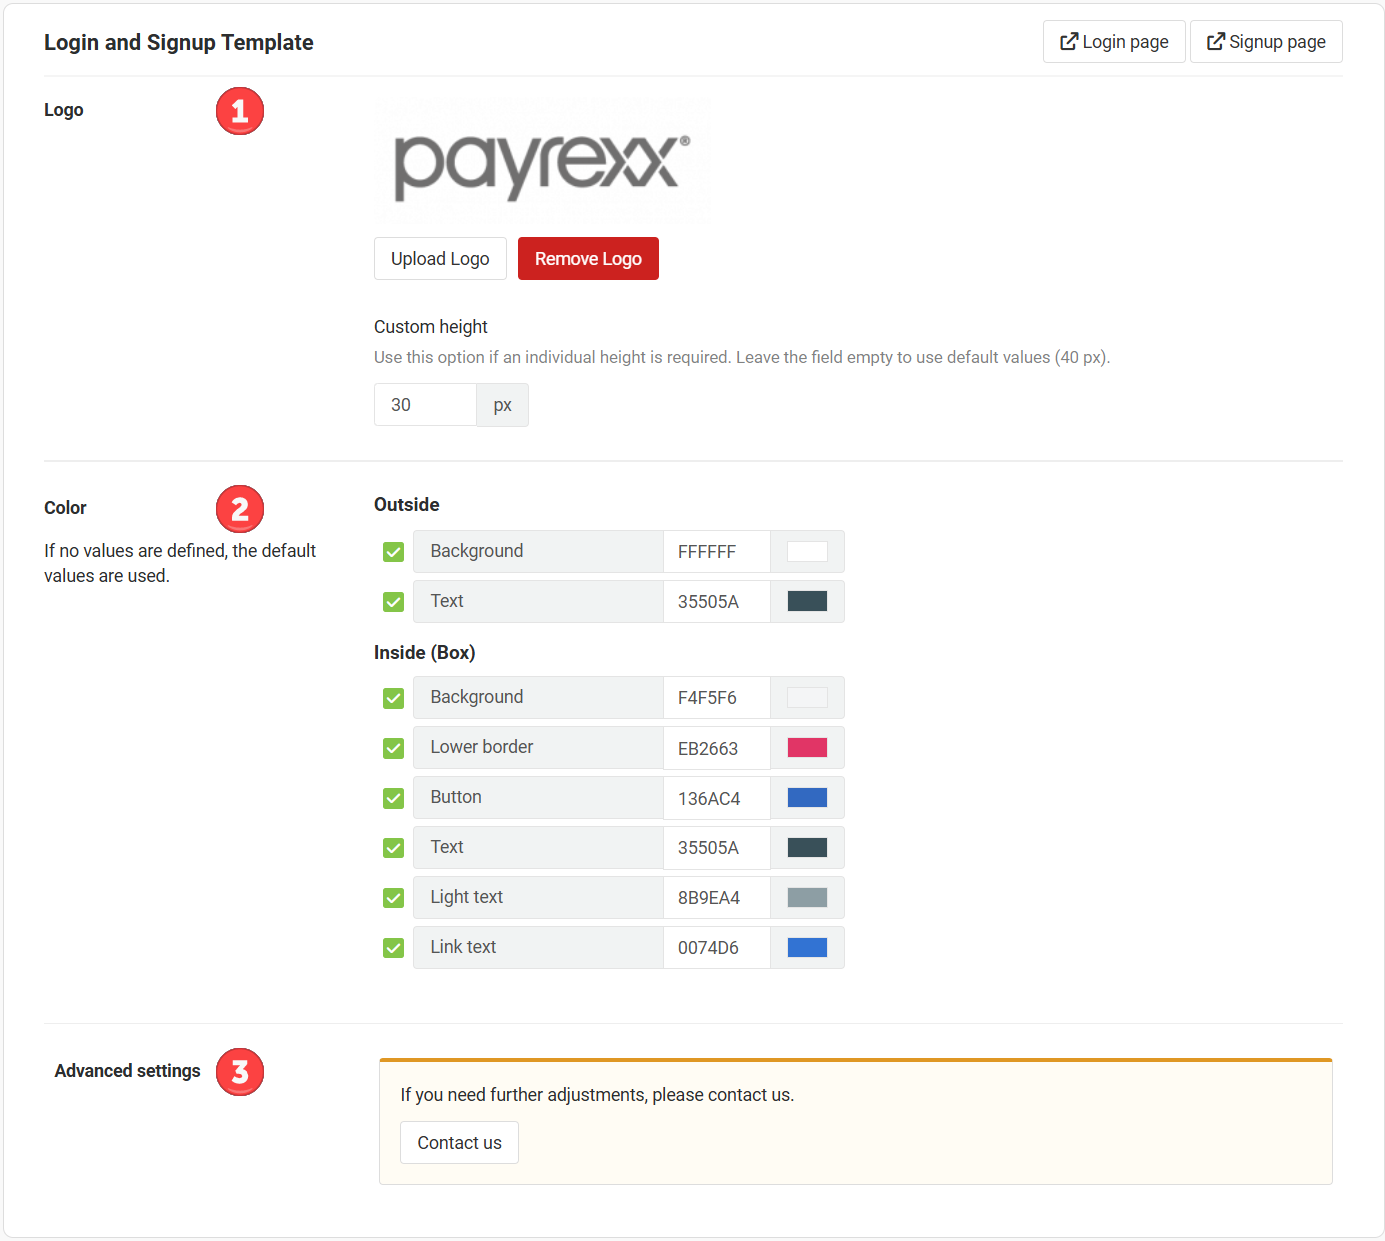
At the bottom section of the window, you will find various settings for the two pages where existing merchants log in or new merchants register:

<div align="left"><figure><img src="https://13947520-files.gitbook.io/~/files/v0/b/gitbook-x-prod.appspot.com/o/spaces%2F-McKWr2N1ZENCggMlAH5%2Fuploads%2FsmLCfl5Ju8C2mh44NaP2%2Fimage.png?alt=media&amp;token=f7d6dc13-b722-4762-aa97-1a96d3085e4f" alt=""><figcaption><p>Settings for the login and registration page in the Payrexx platform administration</p></figcaption></figure></div>

#### 1. Logo

Select the logo to be displayed on the pages where merchants register or log in. By default, the logo is shown at a height of 40 pixels. If desired, this value can be adjusted by entering a custom height in the “Custom Height” field.

#### 2. Color

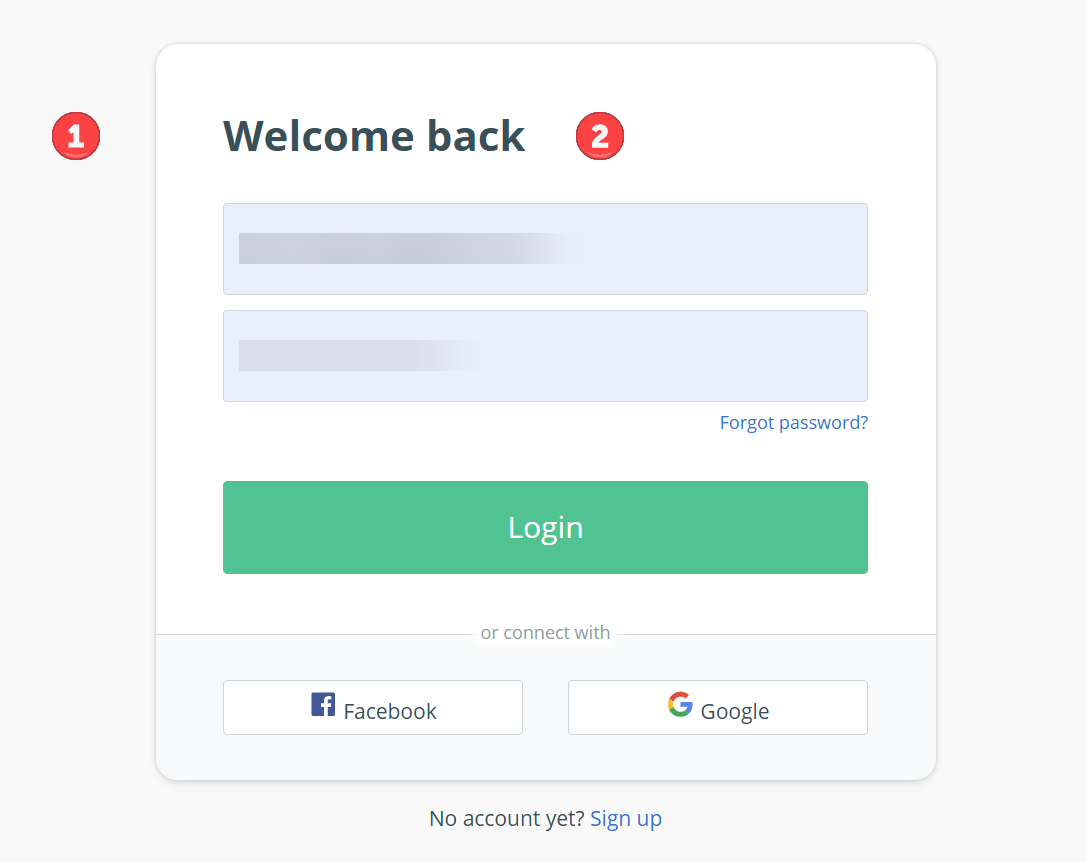
In this section, you can define the colors to be used on the registration and login pages:

* **Outside:** Set the background and text colors for the outer area.
* **Inside (Box):** Set the colors for the background, border, buttons, text, and links within the inner area.

<div align="left"><figure><img src="https://13947520-files.gitbook.io/~/files/v0/b/gitbook-x-prod.appspot.com/o/spaces%2F-McKWr2N1ZENCggMlAH5%2Fuploads%2Fvzp2VcQNNxgAlPHrrL1i%2Fimage.png?alt=media&amp;token=d192d9f2-5f03-40da-b362-d78a3f18bf00" alt="" width="563"><figcaption><p>The Payrexx login page with its outer and inner area</p></figcaption></figure></div>

#### 3. Advanced Settings

Under "Advanced Settings", there is a button to contact Payrexx.


---

# Agent Instructions
This documentation is published with GitBook. GitBook is the documentation platform designed so that both humans and AI agents can read, navigate, and reason over technical content effectively. Learn more at gitbook.com.

## Querying This Documentation
If you need additional information that is not directly available in this page, you can query the documentation by asking a question.

Perform an HTTP GET request on the following URL with the `ask` and `goal` query parameters:

```
GET https://docs.payrexx.com/platform/english/admin/settings/backend-template.md?ask=<question>&goal=<user_goal>
```

`ask` is the immediate question: it should be specific, self-contained, and written in natural language.
`goal` is what the user is ultimately trying to achieve, the reason they need the answer. Sharing it helps GitBook give you a better, more relevant answer. A goal is most helpful when it describes the outcome the user wants rather than restating the question. For example, with `ask=how do I create an API token`, a goal like `automate deployments from our CI pipeline` lets GitBook tailor the answer to that use case.

The response will contain a direct answer to the question and relevant excerpts and sources from the documentation.

Use this mechanism when the answer is not explicitly present in the current page, you need clarification or additional context, or you want to retrieve related documentation sections.